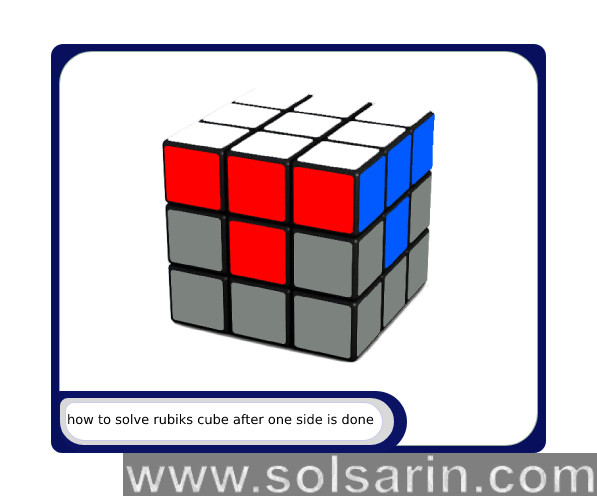
how to solve a rubik’s cube after one side is done
Hello friends, welcome to Solsarin.
On this page, we want to talk about how to solve the Rubik’s cube after completing one side.
Stay with us
The Rubik’s Cube: How to Solve It
A lot of memorization is required for some solutions, and very little thinking is required.
In some cases, you need to think a lot, but not to memorize a lot. Several others are extremely fast but require lots of both.
It is a fairly slow solution that requires little thinking and only minor memorization.
Consequently, reading this page only once won’t suffice to solve a Rubik’s Cube immediately.
The process will require a great deal of memorization, but it’s not insurmountable.
This solution has been memorized in a day by some people.
You might get your best time around a minute and a half if you learn this solution thoroughly.
I recommend you learn the Fridrich Method or another speed cubing method once you master this method.
Keep these axioms in mind:
- Each of the 21 parts of the cube moves individually. The pieces include one triple-axis, twelve edge pieces, and eight corner pieces.
- The center square remains the center square regardless of how the cube is turned. There is no point in turning the cube when there is an edge piece on it.
- It doesn’t matter how you turn the cube, a corner piece will always be a corner piece. There is no change in the position of the center pieces in relation to each other. Although it appears that they are moving, they only twist around in place.
- Two stickers are on an edge piece. There will never be a difference between those two stickers. A color cannot be moved without the other. In the same way, corner pieces should be treated the same.
As an aside:
An oriented object is different from one that is positioned. Segments that are positioned incorrectly are said to be incorrectly positioned. As long as a segment faces the wrong way but is located in the right place, it is oriented incorrectly.
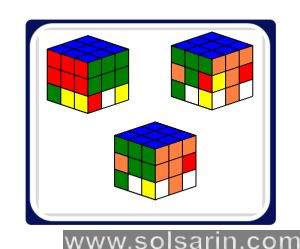
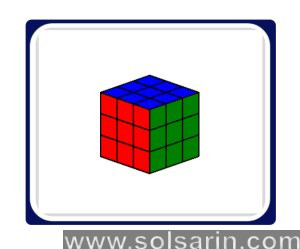
First Step: Solving One Side
Instructions in Steps:
- There’s no need to panic
- In most examples, I will use blue, so whenever I say blue, I really mean top color.
- In the center of the face, find a sticker with that color. Your top will be this one.
- Put the corresponding edges and corners of that color next to the center cube while ensuring the top colors of the outside row line up.
It is important not to interfere with the edge pieces that are already in place when moving an edge piece. It is better to move the top side so you do not mess up your work.
Remember to align the colors on the edges of the edge pieces with those on the center pieces.
You can then move on to solving the corners once you’ve mastered that.
The corner you want to move on the bottom row should be moved directly underneath where you want it. As you get to the top row, make sure the colors match up. Avoid moving a blue, yellow, and orange corner piece underneath a blue-red and blue-green edge piece.
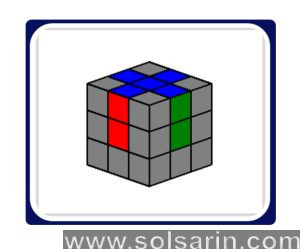
Second Step: The Middle Row
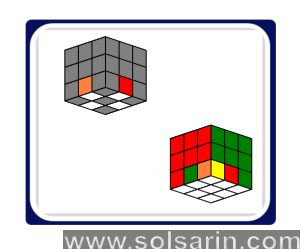
In order to make small T’s on each side of the top face, twist it until the center cube on each adjoining face matches in color with the three squares above it.
In the middle is an edge piece that has green on one side and orange on the other.
The bottom face of your cube is the face you should be looking at. The bottom color should match the center sticker on the bottom; it should be the same color as the center sticker.
Check the edge pieces on the bottom and find one that doesn’t have the bottom color. Therefore, this edge piece should be positioned in the middle of the row.
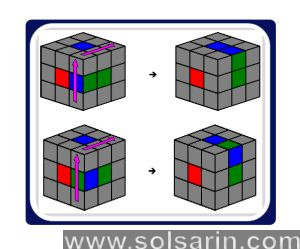
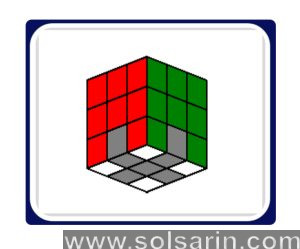
You can move a piece between the bottom row and the middle row using the next two algorithms. It is important to note that the colors given are only examples of what your cube may look like. (Red is the front, green is the right)
This red green edge is in the middle row, but it is oriented incorrectly or not in the right place.
From the bottom row, select a random piece. Make the red green edge piece from the bottom row the random piece from the bottom row and solve it. As soon as you place this wrong piece in the red-green’s spot, the real red-green will fall back to the bottom. Using the steps above, you can position the red green piece in a normal manner once it’s in the bottom row.
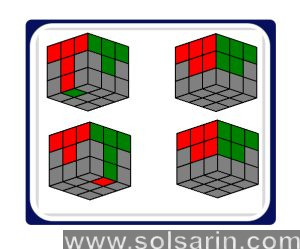
The third step is to orient the bottom corners
Frequently, this next step in the solution is misunderstood, so pay close attention to it.
Afterwards, the four corners need to be oriented. You should align your cube’s corners with those in the following pictures.
Please disregard the pieces that do not form corners at the bottom of your cube.
Skip this step if all the pieces are correctly oriented.
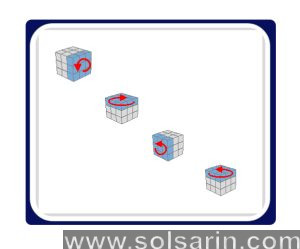
For the next move, the bottom of the cube is compared to determine how it should be held.
Black spots represent the bottom color of your cube. The following methods can be used to combine corner orientations.
The corner that most closely resembles the bottom of your cube should be identified. The cube should appear exactly as shown in this photograph as you hold it.
If it is not aligned, it may need to be rotated.
It is important to remember that ‘2’ means that the indicated face should be turned twice. It is not important in what direction it is turned. Regardless of how you view it, the result will be the same.
When all four corners have been aligned properly, return to the beginning and continue the process. If the process is conducted correctly, it should only require three repetitions. Some things are easier said than done, but there are times when you get it right the first time.
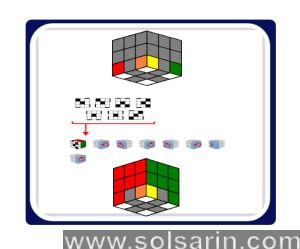
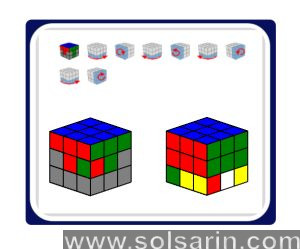
Fourth Step: Orient the bottom edges
This step only offers four options for bottom edge orientation. There must have been someone peeling your stickers if none of these match your cube. There’s nothing complicated about this step. It is not necessary to align gray squares; it is necessary to align white squares. In the picture, the cube is shown held in the correct manner. You may do some moves that are destructive to your progress if you don’t hold it so that the white corresponds exactly to where the disoriented edges are.
In general, these moves follow this pattern, which makes them fairly simple to memorize:
The front should be turned somewhere between left and right,
The bottom should be turned left down, right down, somewhere in between.
Repeat the process.
To match the cube with the diagram below, peek underneath it. A white square represents an edge that has been oriented incorrectly.
Fifth Step: Position the bottom corners
In step 5, there is only one move to memorize, so you can take a deep breath.
Consequently, the two corners of the bottom front will shift without their orientation changing.
Ensure that all four corners are aligned correctly by repeating the move.
It does not matter at this point what the edges are.
Sixth step: Position the bottom edges
In this step, you only need to memorize two moves.
The following moves will rotate the edge pieces
- Clockwise rotation of the yellow pieces
- Counterclockwise rotation of the yellow pieces
As long as all edges are in place, you can keep using this 3-edge switch algorithm.
done. I congratulate you!
read more:
- tannins in green tea
- does a platypus have a stomach?
- sociologists use the concept of “norms” to describe
- what must be visible while operating a pwc
- smallest cell in the human body
- an example of a pull factor would be
- what is a thrust fault