Chocolate Pudding Pie With Cool Whip
Hello everyone. Welcome to our site solsarin. This topic is about “Chocolate Pudding Pie With Cool Whip”. Please stay with us. Thank you for your patience.
WHAT IS CHOCOLATE PUDDING PIE?
Chocolate pudding pie is an old-fashioned recipe that has been around for hundreds of years! Actually, make that thousands of years! According to foodtimeline.org – the earliest print reference found for chocolate pudding is 1730. They go on to say that this type of pie was most often enjoyed by wealthy people. Fancy! Today, there’s many different ways to make it, including from scratch, but I think the best way to make it is with a box of instant chocolate pudding mix because it’s SO easy.
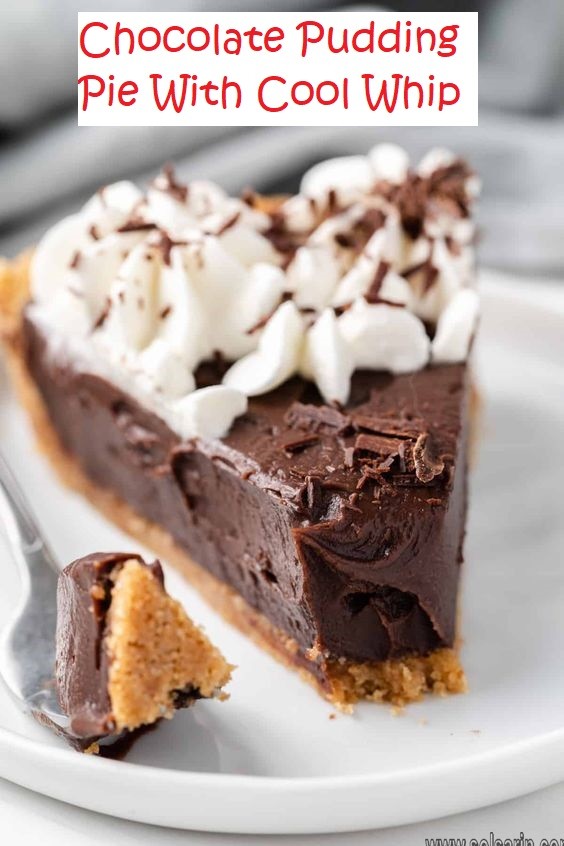
My grandma’s recipe simply involves mixing up the chocolate pudding, pouring it into a graham cracker crust and topping it with whipped cream (we always use Cool Whip). I elevated her chocolate pudding pie recipe to include an extra layer – a decadent, delicious cheesecake layer. Yes, please!
If you’ve never made or tried a chocolate pudding pie, please do so VERY soon. Add it to your Thanksgiving dessert menu! It would be a great alternative to pumpkin pie. Or make it to enjoy after Christmas dinner. Since it’s a no-bake recipe, it doesn’t compete for precious oven space, plus you can make it a day or so ahead of time and let it chill in the fridge. It’s also just a great any time treat!
With a combination of cheesecake filling and creamy pudding piled into a sweet, buttery graham cracker crust, this layered chocolate pie is the cure for many things including holiday blues, PMS, homesickness, lovesickness, and is a total hit with almost everyone that tries it!
Chocolate Pudding Pie Recipe
Enjoy the simple things in life, like this Chocolate Pudding Pie Recipe. Spoon chocolate JELL-O Pudding over an chocolate pie crust in this Chocolate Pudding Pie Recipe made with COOL WHIP.
What You Need
Let’s Make It
Creamy Cool Whip Chocolate Pie
This fluffy chocolate pie is always a crowd-pleaser. You can also use low-fat and/or sugar-free ingredients to make this a less guilty indulgence.
Ingredients
1 1/2 cup cold milk
2 packages (4 serving size) instant chocolate pudding & pie filling mix
1 tub (12 ounces) Cool Whip, thawed
1 (6 ounce size) prepared chocolate cookie crumb crust
Directions
Add the milk to a large bowl. Whisk in the pudding mix with a wire whisk until fully incorporated and the mixture has thickened (about 1 minute).
Fold in 3 1/2 cups of the Cool Whip until the filling is a uniform color.
Spoon the filling into the cookie crust, spreading it evenly in the crust.
Place the pie in the refrigerator for 4 hours.
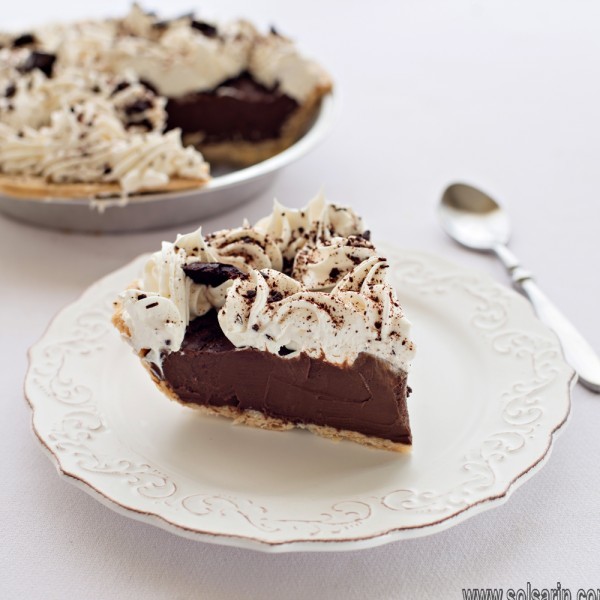
When the pie has set, garnish with the remaining Cool Whip. You can also garnish with grated chocolate or crushed oreo cookies if desired.
Store any leftover pie in the refrigerator.

Easy Chocolate Cream Pie
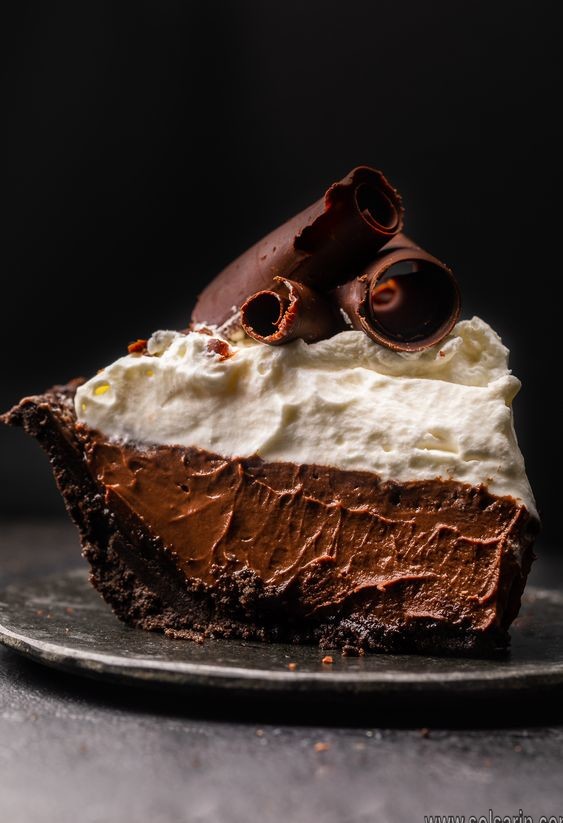
Chocolate Cream Pie with Cool Whip is the easiest way to make this classic chocolate pie! It’s cool, creamy, and so easy to make with just three ingredients for the filling. You don’t need to worry about this recipe – it’s foolproof and turns out perfectly every time.
Cool, creamy, rich – what’s not to love about a chocolate cream pie? It’s a decadent dessert, and I am pleased to share it’s an easy one, too!
Chocolate cream pie gets its light and creamy filling from whipped cream. Traditional versions have you make fresh whipped cream (I have a classic cream pie made this way) to fold into the filling. I have a chocolate cream pie with a fresh whipped cream filling, but sometimes I don’t want to worry about whipping cream.
So, I have a shortcut for you: Whipped topping. AKA Cool Whip. Unlike whipping your own cream for the filling, using a whipped topping makes this pie foolproof. It sets up perfectly every time, has that rich and creamy texture, and it’s so much easier to make.
Ingredients
- Cookie Pie Crust: use my peanut butter cookie pie crust or your favorite kind
- Chopped unsweetened chocolate: baking chocolate, from the baking aisle
- Sweetened condensed milk: the body of the pie
- Cool Whip – for the filling and the topping: makes this pie SO EASY
How to Make Chocolate Cream Pie with Cool Whip
1. Melt: Melt the chocolate in the microwave in 30-second increments. Stir it between each 30 seconds until it’s melted and smooth. Let it cool for five minutes.
2. Mix: Pour the sweetened condensed milk into the bowl with the chocolate. Stir until smooth.
3. Fold: Gently fold eight ounces of whipped topping into the chocolate mixture. To fold, take your spatula and run it under the ingredients and gently pull them up over themselves using a folding motion. You want to preserve as much air as possible in the topping, so your filling is light and airy.
4. Fill: Spread the filling into the pie crust. Refrigerate the pie for at least two hours.
Decoration Ideas
For serving, I like to top the pie with whipped topping and dust it with cocoa powder. Or you can add some grated or shave semi-sweet chocolate as a decoration.
Storage Tips and Making the Pie Ahead
This recipe is so easy I usually make it in the morning and then leave the pie to chill in the fridge until I’m ready to serve it. You can also make it the night before – just wait to add the whipped topping and decorations until you’re ready to serve it.
The leftover pie will keep in the refrigerator for three to four days. Because the filling is made with Cool Whip, it’s more stable than one made with fresh whipped cream and will keep a little better. The filling will eventually start to break down, so it’s best to enjoy the leftovers within a few days.
“Enjoying the leftovers” is not something we find to be a challenge with this pie at our house! It tends to disappear as quickly, which is fine because it’s so easy to make another one. Once you try this foolproof chocolate cream pie, you’ll see what I mean – it’s irresistible!
FAQ & Tips
- If you want to make this with fresh whipped cream use this recipe.
- Even Cool Whip can fall if you over mix it so be sure to FOLD the chocolate mixture into the whipped topping.
- Freezing: because it’s made with cool whip this pie can be frozen whole or as slices. It’s even delicious frozen!
- Substitutions: you can use any kind of whipped topping (low fat, sugar free, etc). You can also use semi-sweet chocolate if you don’t have unsweetened, it’ll just be a sweeter pie.
Pros of a no bake chocolate dessert
If you’ve never tried a no bake chocolate dessert, you might have your doubts about whether it’s worth it or not.
You might think that a cake made without putting it in the oven is far too weird to be just as good as one made without any baking.
It’s true that a no bake dessert isn’t the same as a cake baked in the oven, they’re different. But different doesn’t have to mean bad.
Here are some of the pros for making a no bake dessert, to prove that it’s a great option:
- It’s easier:
Baking a cake can require a lot of effort, and it can be quite tricky to get right so that the result is tasty and enjoyable. With a no bake chocolate dessert, there is no need to use an oven, as it won’t require any baking.
This means it’s a lot less effort, and a lot easier to make overall! It also means that it’s a great kitchen activity to do with children. As there’s no oven involved, it’s completely safe, and it will get the children involved in making their own food for later!
- It’s faster:
As a no bake dessert doesn’t require any oven time, you’ll be saving a lot of time. Once you’ve put it together, you just stick it in the refrigerator to set!
No need to spend a long time in the kitchen to make your own dessert. This also means that it’s great for making on days in which you don’t have as much time, or as a quick fun activity at home that won’t take up hours at a time.
- It’s served cold:
No bake desserts are set in the refrigerator and are therefore best served cold. This makes them a great dessert option during the hotter seasons!
- It can be frozen:
When you make a no bake dessert, you can set it in the refrigerator to enjoy that very same day, or you could set it in the freezer where it will be ready to enjoy at a later date. Meaning, you can make it days in advance!