how to put alcohol in chocolate
Hello dear friends, thank you for choosing us. In this post on the solsarin site, we will talk about ” how to put alcohol in chocolate“.
Stay with us.
Thank you for your choice.
How to Make Chocolate Liquor Cordials
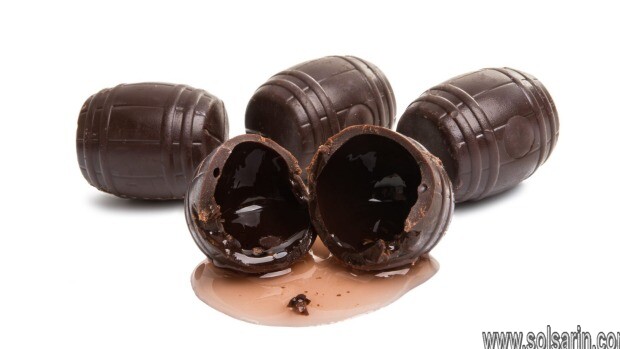
Is there any greater pleasure than consuming a tiny chocolate bottle of your favorite alcohol?
Think about it: a rich, bittersweet shell of chocolate hides a wafer-thin shell of sugar. At the first bite, a rich “snap” rewards your efforts, which is soon followed by the warming flush of a small sip of liquor. The flavors mingle, interact, explode!
But wait… You just realized, you can’t get your favorite flavor of alcohol in a candy, can you? Sure, if all you want is whiskey, rum or cognac. But we here on Instructables are connoisseurs of the exotic and unusual.
Where’s the cobra whiskey candy?
Can we put grapefruit liquor to work? What about skittles or bacon vodka?
“Oh,” you may be saying to yourself, “if only we could make these candies at home, the happy drunken sky would be the limit!”
Well, I’m here to tell you that your heartbreaking search is at an end – you can make these confections yourself… and it’s easier than you think.
Step 1: Sweet, Sweet Science
First, sugar and water are heated together to a set temperature in order to produce a near-saturated sugar solution. That means that the water has dissolved the maximum quantity of sugar possible – the addition of more sugar will cause the formation of crystals.
Second, warm liquor of the chef’s choice is added to bring the solution slightly above the saturation point.
Third, the solution is gently transferred to pre-prepared cavities in a bed of pre-dried cornstarch. The starch provides seeding points for the now supersaturated sugar solution. If the concentration of sugar in the candies is right, a thin shell of sugar will grow around the liquid centers. When the interior solution has been sufficiently depleted of sugar, the growth of the shell will stop.The candies can be consumed as they are, or dipped in chocolate to provide a nice finishing touch.
I recommend starting this procedure in the morning on a Saturday. This way, the starch can be dried in the morning, the sugar syrup can be prepared around lunchtime, and the candies will be ready to eat by Sunday morning.
Step 2: Required Equipment
A quick note about measurements – I am a follower of the school that believes everything should be measured accurately, especially in the kitchen. For pasta sauce, this isn’t really necessary, but for candymaking precision is vital.
You will need a decent scale with a sensitivity of at least 1 g, and a good instant-read digital thermometer. Both of these items can be found cheaply at any store with housewares, and are well worth the cost.
For the starch molds:
Two baking dishes (9″x13″)
Two large metal bowls
Several boxes of cornstarch (four to eight)
A metal mesh strainer/sifter
An object to be molded – this doesn’t have to be fancy, it can be anything from a small bottle to a dowel to your finger.
For the candy solution (makes about 100 small pieces):
Small saucepan
Plastic tablespoon
87 g water
247 g sugar
100 g alcohol. The alcohol chosen must have a reasonably high proof to work. Beer won’t work at all, and even wine would be pushing it.
Step 3: Prepare the Molds
The first thing you need to do is to dry your starch well. Very dry starch repels liquids, causing it to bead up. If your starch is too moist, it will absorb the candy solution and leave you sad and frustrated.
Fill each baking dish with enough starch to make an even layer about 1 3/4 inches deep. Transfer the starch to the two metal bowls, and place in a 200 degree (fahrenheit) oven for 3-4 hours.
Once the starch has dried, sift it from the bowls into the baking dishes. Aim for a layer about 1 1/4 inch deep. You need to retain a good bit of starch for later – don’t forget that, like I always do.
Extinguish all open flames for this step (seriously). Airborne starch can explode, and you’re going to be getting it everywhere.
Shake the dish to spread the starch around, and level it with your spatula.
To produce the cavities for your molds, simply press the object to be molded into the starch to a given depth. I used the pestle from my mortar and pestle – the red mark indicates the depth of the starch, and the blue one is the depth I wanted my cavities to be. This gives me nicely gumdrop-shaped candies.
Step 4: Prepare the Syrup
Pour the sugar into the center of the saucepan, making sure that the middle is higher than the sides. Avoid getting crystals stuck to the sides of the pan.
Pour the water down the sides of the pan. This will wash down any errant flecks of sugar.
Heat on a medium-high burner until the temperature of the syrup reaches 246 F (119 C) for unsweetened liquors, or 243 F (117 C) for sweetened liquors. Yes, that three degree difference really does matter. If crystals have formed on the side of the pan, wash them down with a silicone pastry brush dipped in cold water.
When the required temperature has been reached, remove the saucepan from the heat. Add the liquor, which has been warmed in the microwave. Just make it warm to the touch, no need to boil it.
Stir the solution gently until all of the liquor has been incorporated.
If you agitate the solution too much at this point you can induce crystallization, which will ruin all the work you’ve done. Just stir the solution in – slowly – with the plastic spoon.
Once it’s all mixed, you can fill the molds.
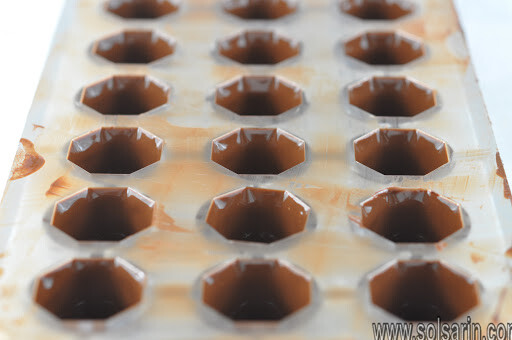
Step 5: Fill the Molds
Using the plastic spoon, gently fill the cavities you’ve prepared in the starch almost to the top.
Sift the reserved dried starch over the tops of the molds, making sure you’ve covered them fully.
If you’ve forgotten to reserve starch for this step, fill the cavities about 3/4 full, and (carefully) sweep starch from the top over the candies using a dry pastry brush.
Let the candies sit for 3-5 hours. Flip the starch-containing tray over (Tupperware-topped Pyrex trays work well for this step), and let it sit overnight.
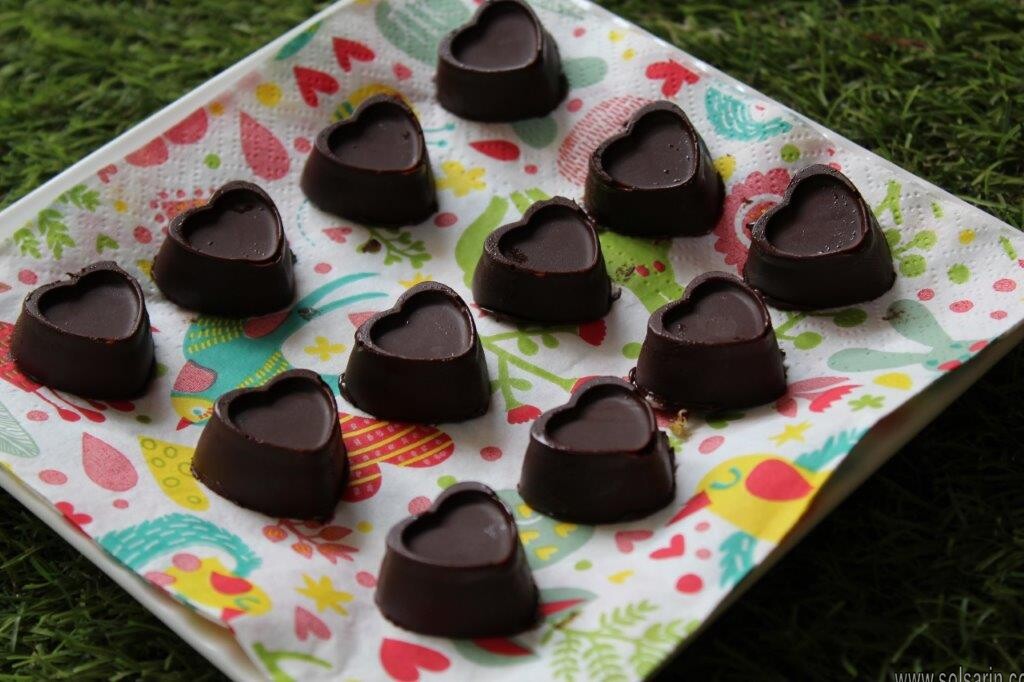
Step 6: Finish the Candies!
The next morning, the candies are ready! Digging them up is fun, but messy. For maximum efficiency I recommend scooping out ladlefuls of starch and gently sifting it into a large metal bowl. As the candies are revealed, pick them out and set them on a plate.
DO NOT THROW THE STARCH AWAY. The starch, having been properly dried, can be stored and re-used as many times as you want! It’s the ultimate molding material for candies – food-safe, infinitely re-usable, and dirt cheap.
At this point, the candies are delicious but not shelf-stable on their own. If you don’t want to coat them with chocolate, be sure to put them in a sealed, dry container or to consume them within 24 hours.
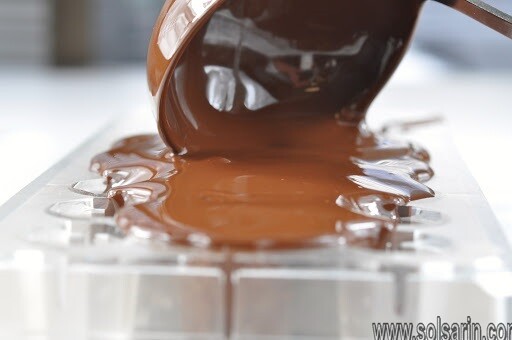
To coat them, temper a batch of chocolate.
To do this, melt chocolate in a bowl in the microwave by heating for 5-15 second increments and stirring with the thermometer (which you have washed and dried well, by the way). If you start with tempered chocolate and do not let the temperature exceed 97 F (36 C), you will not lose your temper.
Chocolate
Chocolate is a preparation of roasted and ground cacao seeds that is made in the form of a liquid, paste, or in a block, which may also be used as a flavoring ingredient in other foods. The earliest signs of use are associated with Olmec sites (within what would become Mexico’s post-colonial territory) suggesting consumption of chocolate beverages, dating from the 19th century BC.[1][2] The majority of Mesoamerican people made chocolate beverages, including the Maya and Aztecs.[3]
resource: wikipedia
read more: