mary berry 10 inch sponge cake recipe
Hello dear friends, Thank you for choosing us. please join us on the solsarin site,In this post we will talk about “mary berry 10 inch sponge cake recipe ”.
Stay with us.
Thank you for your choice.
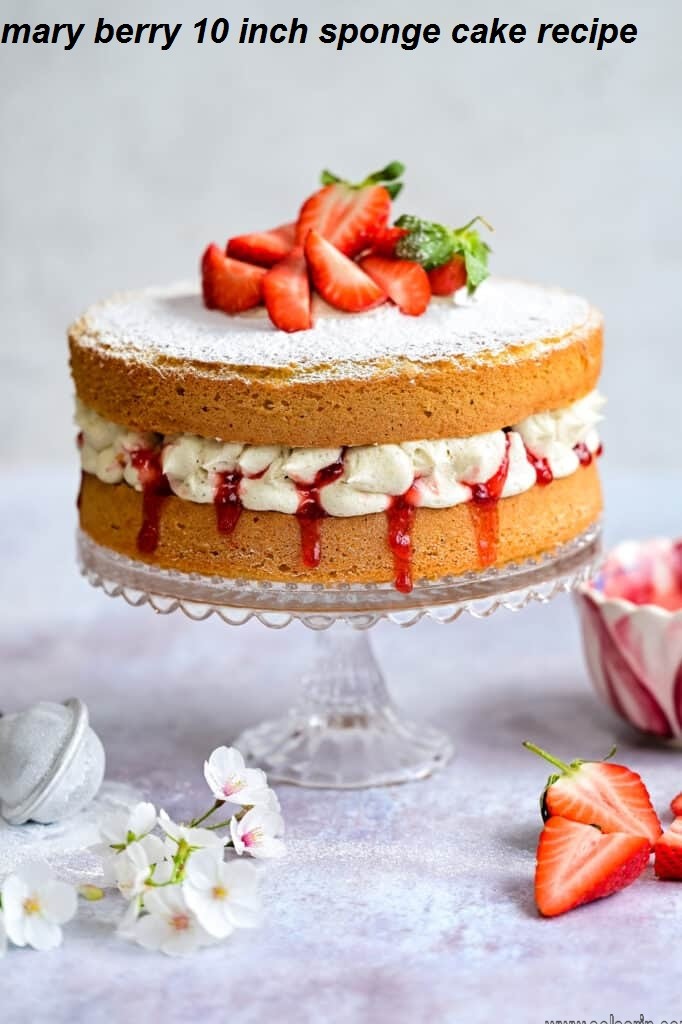
MARY BERRY’S MADEIRA CAKE
A classic berry sponge recipe for chocolate and orange cake. It’s very easy – you can make it in a food processor in minutes.
If you love Mary’s recipes, we’ve also got a rich fruit cake recipe, and a malted chocolate cake. Go discover!
Mary Berry’s Madeira Cake, a classic dessert recipe for your afternoon tea party. It’s a light and fluffy sponge made with simple ingredients, and the lemon touch makes the cake flavourful and fresh.
It’s summer, which means it’s the season of afternoon tea parties, picnics and family gatherings. And nothing goes down better on such occasions than a nice cup of tea and a slice of cake.
It’s a well-known fact that I am a big fan of Mary Berry’s desserts, they really are the very best when it comes to baking a traditional British dessert. From Lemon Drizzle Cake, to Victoria Sponge Cake, or Coffee and Walnut Cake, there is always a great treat to bake from her fabulous recipes.
This madeira cake is another example that simplicity can mean perfection too. There is no cream, or expensive toppings, or anything like that, and yet, you get a beautiful dessert that everybody will ask for seconds.
All you need is a cup of tea, and you are set. Forget about ready-made cakes, the homemade ones are not only cheaper to make, but also more flavourful, and impressive too.
HOW TO MAKE A MADEIRA CAKE
Before you start baking, make sure the ingredients are at room temperature and the oven is well-preheated, it helps massively if you want to achieve a perfectly-baked cake.
- add the soften butter and sugar to a large bowl, and mix well with an electric mixer until creamy
- add the eggs one by one, mixing well after each addition
- in go the self-raising flour and almond flour, plus the lemon zest
- mix well to get a smooth batter
- grease and flour a cake tin (mine is 23cm in diameter, or 9 inches), and spread the batter well in the pan
- bake at 180 degrees Celsius for 30 minutes or until golden and a skewer inserted in the middle comes out clean
- leave to cool completely before serving
TIPS AND TRICKS
This cake can’t be any simpler to make, but there are some easy steps to follow if you want a perfectly light cake to lick your fingers clean. As mentioned, the ingredients must be at room temperature, if the butter is cold and hard, it can’t be creamed well.
I haven’t added any baking powder, since I used the self-raising flour, but this must be added if regular flour is added, or the sponge won’t rise and it will be too dense.
I added only lemon zest for a more mild kick, but lemon juice can be added to if you are after a stronger citrussy touch. You can also garnish the cake with more zest if you wish.
The cake can also be decorated with icing for a more impressive look, and sweeter feel, although left as it is it’s good enough to me. And that’s all, enjoy a delicious cake for every occasion, be it a great celebration, or just whenever the sweet tooth strikes again.
If you’ve liked the MARY BERRY’S MADEIRA CAKE or any other recipe on the blog then don’t forget to rate the recipe and let me know how you got on in the comments below, I love hearing from you! You can also FOLLOW ME on FACEBOOK, and PINTEREST to see more delicious food and what I’m getting up to.

Mary Berry’s Madeira Cake, a classic dessert recipe for your afternoon tea party. It’s a light and fluffy sponge made with simple ingredients, and the lemon touch makes the cake flavourful and fresh.
- 175 g granulated sugar
- 175 g butter, soften
- 3 eggs
- 225 g self-raising flour
- 50 g ground almonds
- zest from one lemon
Instructions
-
Add the butter and sugar to a large bowl and use an electric mixer to beat everything well until creamy.
-
Add the eggs one by one, beating well after each addition.
-
In go the flour and ground almonds together with the lemon zest.
-
Mix everything well to get a smooth thick batter.
-
Grease and flour a 23 cm/9 inch round cake tin, and spread the batter evenly.
-
Bake in the preheated oven at 180 degrees Celsius (350 Fahrenheit) for 30 minutes or until golden and a skewer inserted in the middle comes out clean.
-
Leave to cool for 15 minutes, then carefully remove from the cake tin, and transfer to a cooling rack to be cooled down completely.
Recipe Video
-
- Click on the US Customary link to see the measurements displayed in cups and ounces.
- The servings can be adjusted by clicking the number next to Servings.
% Daily Value*
METHOD
Step 1
Preheat the oven to 180°C/160°C fan/350°F/Gas 4. Grease and line 2 x 20cm sandwich tins: use a piece of baking or silicone paper to rub a little baking spread or butter around the inside of the tins until the sides and base are lightly coated. Line the bottom of the tins with a circle of baking paper.
Step 2
Break the eggs into a large mixing bowl, then add the sugar, flour, baking powder and soft butter.
Step 3
Mix everything together until well combined. Be careful not to over-mix – as soon as everything is blended you should stop. The finished mixture should be of a soft ‘dropping’ consistency.
Step 4
Divide the mixture evenly between the tins. Use a spatula to remove all of the mixture from the bowl and gently smooth the surface of the cakes.

Step 5
Place the tins on the middle shelf of the oven and bake for 25 minutes. Don’t be tempted to open the door while they’re cooking, but after 20 minutes do look through the door to check them.
Step 6
While the cakes are cooking, make the jam. Place the raspberries in a small deep-sided saucepan and crush them with a masher. Add the sugar and bring to the boil over a low heat until the sugar has melted. Increase the heat and boil for 4 minutes. Remove from the heat and carefully pour into a shallow container. Leave to cool and chill to set.
Step 7
The cakes are done when they’re golden-brown and coming away from the edge of the tins. Press them gently to check – they should be springy to the touch. Remove them from the oven and set aside to cool in their tins for five minutes. Then run a palette or rounded butter knife around the inside edge of the tin and carefully turn the cakes out onto a cooling rack.
Step 8
To take your cakes out of the tins without leaving a wire rack mark on the top, put the clean tea towel over the tin, put your hand onto the tea towel and turn the tin upside-down. The cake should come out onto your hand and the tea towel – then you can turn it from your hand onto the wire rack. Set aside to cool completely.
Step 9
For the buttercream, beat the butter in a large bowl until soft. Spoon the buttercream into a piping bag fitted with a plain nozzle.

Step 10
To assemble, choose the sponge with the best top, then put the other cake top-down onto a serving plate. Spread with the jam then pipe the buttercream on top of the jam. Place the other sponge on top (top-side up) and sprinkle with caster sugar to serve.
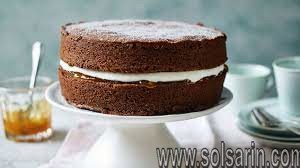
Chocolate Cake
The Best Chocolate Cake Recipe – A one bowl chocolate cake recipe that is quick, easy, and delicious! Updated with gluten-free, dairy-free, and egg-free options!
The best chocolate cake recipe. Ever? There are plenty of claims for the best chocolate cake recipe. I get that. But with one bite of this decadent, moist chocolate cake with chocolate frosting, every single person around the table commented that this was the best chocolate cake they’d ever tasted.
delicious. tips
- Make simple chocolate curls by carefully running a vegetable peeler down the side of a bar of chocolate. Or, melt some chocolate, spread it thinly on a marble work surface or clean, smooth plastic chopping board. When it has cooled and hardened, carefully scrape it up into curls in short steady movements, holding a knife blade parallel to the work surface at 45 degrees.